Making promotional graphics
A well designed promotional graphic can be a great way to drive traffic through your site. Here's one way to do it.
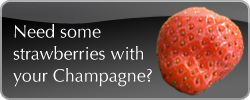
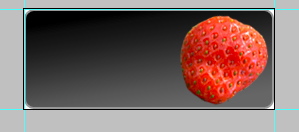
This tutorial shows you how to make a graphic like this:
Step 1 - Making a background 
First we are going to draw a curved rectangle with a white background. The image size we are using here is 250px x 100px. Draw a rectangle with the Rounded Rectangle Tool with a radius of 10px. We are going to add a gradient to the rectangle. First select the Gradiant tool and then select the colours we are going to use. In the colour selector (below the tools) choose #000000 as the primary colour and #666666 as the secondary colour.
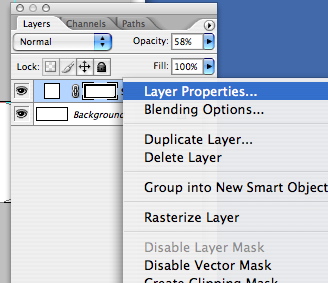
Right click on the rectangle layer and choose Blending Options. Using these options we add a Stroke of 1px inside the rectangle. Then we add a Gradiant Overlay.
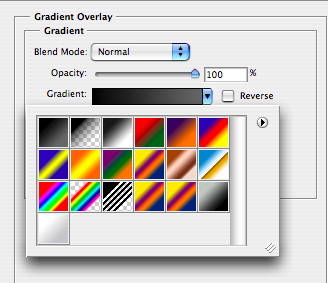
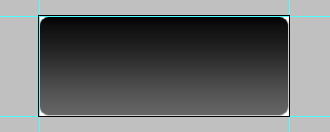
Click the Gradiant Colour dropdown. You will see your two colours you chose in the top left hand corner. Select these colours and the Gradiant will be applied. We want the colour to go from dark to light so change the angle to -90. Your image should now look like this.
Step 2 - Add an image 
Whether you are promoting a service or a product you will need an image. Cut the image out using the Magic Wand tool. How you position the image is up to you but I like to rotate the image slightly to break up the grid. To do this select the layer the image is on and hit Apple + T (CTRL + T on Windows). This invokes the Transform tool. You can rotate the image by hovering over one of the corners until you see a small rotate icon. In this example I’ve cut out a strawberry.
Step 3 - Add the text 
The text is as important as the image. It needs to be short, snappy and to draw the reader in. Try to lace the text and image together with the copy.
Step 4 - Applying the gloss 
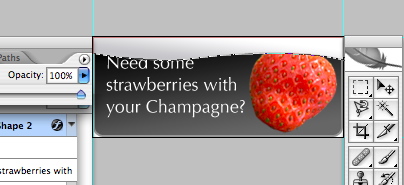
To give the image a gloss we are going to use the Pen Tool to draw a highlight on the top of the image. Using the Pen Tool can be a little tricky but it well worth mastering as you will find yourself using it a lot. Select the pen tool and and white as the colour. Draw a curve using the pen tool to give a glossy effect. Reduce the opacity on the layer that you have drawn with the Pen tool to create the highlighted effect. I’ve taken it down to about 40%. If you image is going to be on anything other than white use a layer mask to make sure the gloss is tight around the box. Finally make sure that your text layer is on top so that it is clearly legible. Here it is:
A cautionary note 
Be aware that Google will not spider the text that is on your image. If the copy is very important you may with to use a background image and keep the text. At least you should specify ALT text for the image.
Tags
Can you help make this article better? You can edit it here and send me a pull request.
See Also
-
Choosing a colour scheme for the web
Choosing a colour scheme, or swatch, is one of the first things you need to do in planning a design. Thankfully Adobe provides a number of tools that make creating and managing swatches simple. -
Curving The Edges of Images in Photoshop
I get a lot of search engine referrals from people looking to create curved images or curved rectangles in Photoshop. So here's a quick tutorial to show you how. -
Photoshop 101 - The History Brush Tool
The History Brush Tool allows you to paint and reveal previous states of images. This can be very useful in creating effects.