Photoshop 101 - The Healing Brush Tool
Primarily an artworking and retouching tool, the Healing Brush allows you to correct blemishes and errors and remove parts of your photos and images.
The Healing Brush is similar to the Clone Stamp Tool in that it is used to sample from an image to correct or enhance other areas of the image. It samples the colour, luminosity and texture of the source area separately and blends it with the destination area. This means you can get excellent results without having to do things manually.
Removing parts of images 
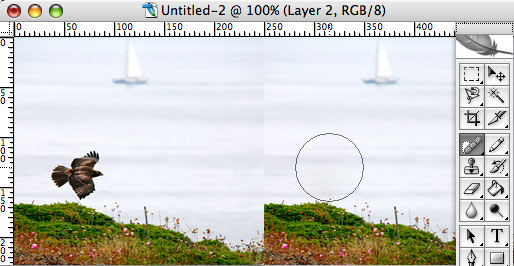
If you simply want to remove something from an image and the background is fairly consistent you can do it using the Spot Healing Brush. The example below shows a photo on Flickr by Juvetson. Lets say I want to remove the Raptor from the photograph. Select the Spot Healing Brush and make sure the brush is bigger than the area you want to replace and click. With one click it is removed. You may need to play with the settings to get things perfectly right but it generally does a very good job.
Correcting simple flaws 
The Healing Brush is perfect for correcting minor blemishes on images. It is more intelligent than the clone tool and is likely to save you time.
The image below contains a blemish on the spine of the green book. To correct it select the Healing Brush Tool. If you are using keyboard shortcuts hit J to select the tool.
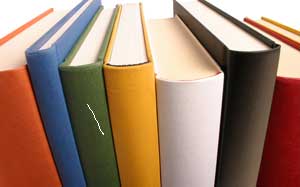
You will need to select an appropriate brush size. Beware that the Healing Brush Tool spreads by around 10 pixels. In this example I chose a small brush so that the two books either side of the green one were not selected.
Find an area of the picture that is similar to the blemished area and then hold down alt. You will see the icon change to a target. Click the mouse to define your target area. Then return to the blemished area and click and drag to repair the blemish. Depending on the image you may need to resample as you go.

Using the Patch Tool 
The Patch Tool allows you to select and patch areas of the image. It is more intelligent than simply copying and pasting a selection. Select the Patch Tool from the Healing Brush menu. In the menu bar at the top you will see the familiar selection options. Next to these are the most important options for this tool: Source and Destination.

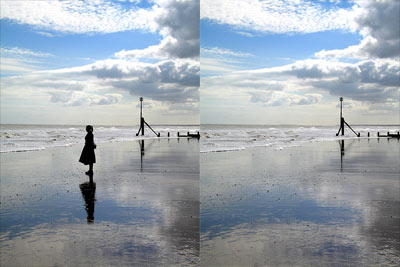
In this great photo from Flickr by Fast Eddie 42 I am going to remove the figure. Using the patch tool I choose source and outline the figure. Then I drag and move the selection left. This Patches the space to remove the figure. Hit Apple + D or CTRL + D on Windows to cancel the selection and see the result.
Red Eye Tool 
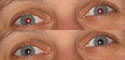
The Red Eye Tool is simply for removing red eye. It is extremely easy to use. Select the tool and zoom in on the eye. Click in the area of the eye that needs correcting. It should correct the red eye. Simple!
Tags
Can you help make this article better? You can edit it here and send me a pull request.
See Also
-
Photoshop 101 - The Slice Tool
For precise interpretation of PSDs to XHTML I recommend avoiding this tool. But there may well be a time when you can use this tool so here's a quick overview. -
Photoshop 101 - The Magic Wand Tool
Especially for high contrast images the Magic Wand tool makes selection simple. A tool for daily use this example shows how to remove a background quickly and easily. -
Photoshop 101 - The Lasso Tool
The Lasso Tool is another invaluable tool for making selections. For those with an unsteady hand or a hangover the Magnetic Lasso Tool will also save serious time in cutting out selections.