Illustrator 101 - Guides and Smart Guides
Guides help you to line control objects and paths easily in Illustrator. Here's a short overview of the options and how Smart Guides can take it a step further.
Basic Guides 
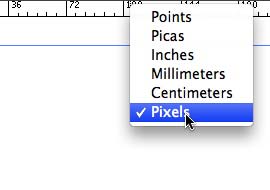
To show rules hit Apple R or Ctrl R on Windows. If you are working on the web you will probably want the dimensions to be pixels so right click on the ruler and chose pixels.

To create a guide simply click hold and drag (just as you would in Photoshop). To align your guides with a point in the ruler hold down shift and it will snap to the points on the ruler. Moving guides isn’t always like Photoshop however. Normally guides are locked by default so if you try and click hold and drag on a ruler as in Photoshop it won’t work. To be able to move guides you need to unlock guides. Go to View > Guides > Lock Guides.
If guides are locked then there will be a tick next to it. If not you should be able to move your guides around. Deleting guides is also different from Photoshop. If you want to delete a guide simply click on it with the Direct Selection Tool (Shortcut V) and hit delete. If it doesn’t work the guides are probably locked so make sure you unlock them.
You can hide and show guides using Apple ; or Ctrl ; on Windows which can come in useful if you want to see your artwork without the guides.
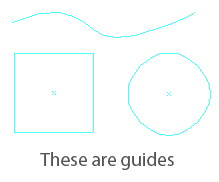
Guides are not just limited to ruler lines though. You can use any pretty much any path to make a guide. This means you can use a rectanlge, circle or hand-drawn path as a guide. To do this draw the shape or path as you would normally do then go to View > Guides > Make Guide. The shortcut is Apple 5 or Ctrl 5 on Windows.

Smart Guides 
Smart Guides are brilliant and if you aren’t using them turn them on by hitting Apple U or Ctrl U on Windows. Smart Guides automate many of the tasks that the Align palette and normal guides perform. They take a little getting used to but once you are up and running you won’t look back.
To line up an edge for example (ensuring Smart Guides are on) click on the edge of the object that you want to line up. Then hover over the shape you want to align to. It will snap to the shape and you can then move it up and down to position. Watch the video below to see it in action. In most cases this is quicker than pulling out rulers or using the Align palette (but if that works for you then great).
guides_illustrator from George Ornbo on Vimeo.
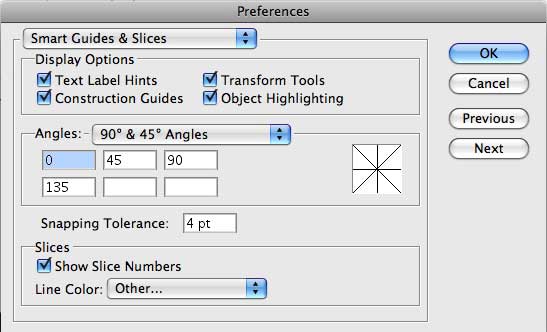
You can set preferences for Smart Guides by going to Illustrator > Preferences > Smart Guides & Slices on the Mac or Edit > Preferences > Smart Guides & Slices on Windows. The preferences pane allows you to decide what shows in Smarts Guides and angles and snapping tolerance.

Tags
Can you help make this article better? You can edit it here and send me a pull request.
See Also
-
Illustrator 101 - The Twirl Tool
The twirl tool is a great tool that can make complex and eye-catching objects in no time. Here's one way to use it. -
Illustrator 101 - The Blend Tool
The blend tool is a great way to build out shapes and design elements in Illustrator. Here's a quick overview of how it works and some techniques to apply. -
Realistic highlights in Illustrator
A short tutorial on creating realistic highlights in Illustrator using clipping masks. The tutorial covers creating a path, adding a gradient and then creating a clipping mask.