Choosing a colour scheme for the web
Choosing a colour scheme, or swatch, is one of the first things you need to do in planning a design. Thankfully Adobe provides a number of tools that make creating and managing swatches simple.
Different approaches to colour schemes 
Agreeing at least a working swatch with a client can make the design process run much more smoothly. Many designers define the swatch after initial logo explorations. I like to get an idea of the swatch and then start on the logo.
How you approach colour schemes is very much a matter of personal choice but my preference is to choose five colours. Three colours are complimentary, one is a contrast and one is a highlight. The tricky part is finding colours that fulfil all of these criteria but go together as a whole. Look around you for inpiration - you might find it on an advert on a bus or on the hairclip of a barmaid. Where there is colour there is inspiration.
Adobe to the rescue 

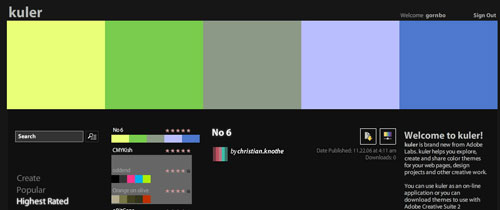
If you haven’t got time to immerse yourself in colour theory or daydreaming the nice folks at Adobe have just launched a very useful online application called Kuler. This allows you to create colour schemes online and even share them. There are many options available to you and moreover you can browse other colour schemes for inspiration.
The only word of caution is that colours generated may not be websafe. For an overview of the issue involved here read this article.
Managing swatches in your projects 
If you are Creative Suite CS2 user you can export swatches from Kuler directly into Photoshop, Illustrator or Indesign. Once you are signed in you can export colour schemes as an Adobe Swatch Exchange File. This is a really useful feature. Try downloading a swatch you like.

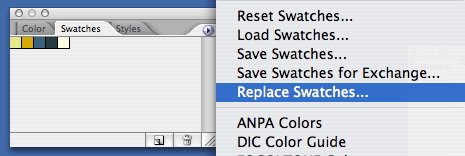
Importing the swatch is straight forward. In Photoshop for example go to Window > Swatches. This brings up the Swatches Window. Click the fly-out menu in the top right hand corner. You can either load swatches or replace swatches. I like to keep things clean in my Swatch window so I choose replace. This shows only the colours from the swatch I am using at the time. I can then design away and have quick access to the colour scheme I’m using. Furthermore if there is another designer on the project I can send the swatch quickly and easily as an .ase file.

Instead of scribbling the colours on a piece of paper you now have them in a swatch that you can refer to at any point. Clicking a colour in the swatch makes it the primary colour so it should make things much easier!
Tags
Can you help make this article better? You can edit it here and send me a pull request.
See Also
-
Curving The Edges of Images in Photoshop
I get a lot of search engine referrals from people looking to create curved images or curved rectangles in Photoshop. So here's a quick tutorial to show you how. -
Photoshop 101 - The Clone Tool
The clone tool allows you to retouch images and remove blemishes. Understanding how it works will allow you to adapt images to your requirements. -
Photoshop 101 - The Brush Tool
The brush tool is one of Photoshop's most basic tools allowing you to draw freehand shapes and lines. The tool allows precision and correction abilities as well as some tricks using brushes.