Photoshop 101 - Transparent Fills
Photoshop doesn't come with the same one-click ability as Illustrator to make the fill of shapes or objects transparent. Here's a workaround.
What we want to achieve 
I want to have shapes or anything for that matter have a stroke but a transparent fill. In Illustrator this would be easy but it requires a little more effort in Photoshop. Here’s an example:
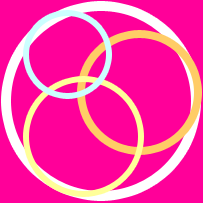
We want the shapes to overlap with a transparent centre but for them also to have a stroke.
The technique 
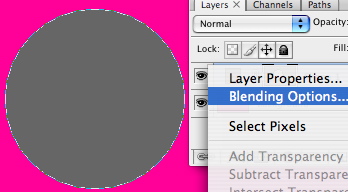
First we draw the shape as normal. It doesn’t really matter which colour you use as this will be hidden. Now in the layers palette (Window > Layers) find the layer for the shape you have drawn and right click on the layer. You will see the following flyout menu. You want “Blending Options”.
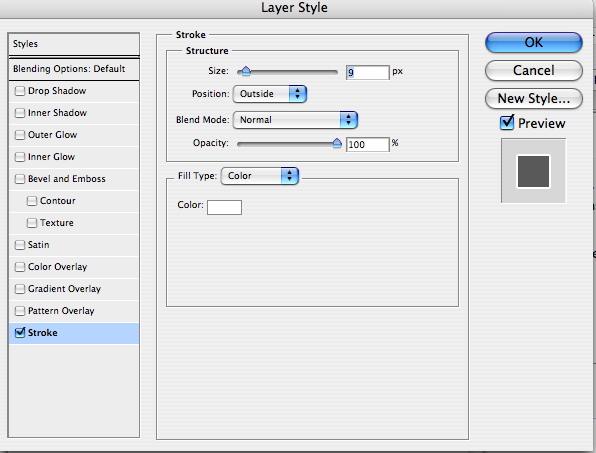
This will bring up the layer style dialog box. Give the shape a stroke by checking the Stroke box at the bottom. You can define the size of the stroke, fill colour and a few other options here.
Almost done 
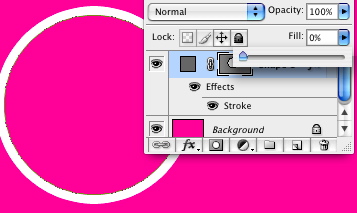
To complete the effect return to the layers menu. You will see the Fill option. Click the flyout and reduce the percentage to 0%. This makes the fill transparent giving us the effect we want to achieve.
You can use this effect with any layer so if you have created a shape with the pen tool this will also work. Now you can happily layer up your shapes with transparent fills!
Tags
Can you help make this article better? You can edit it here and send me a pull request.
See Also
-
Photoshop 101 - The Pen Tool
My favorite tool of all the pen tool allows you maximum control over drawing shapes and paths. It can be a little tricky to master at first but once you are up and running you won't look back. -
Photoshop 101 - The Type Tool
Adding type to designs is a daily task in Photoshop. Especially if you are interested in Typography mastering this tool is a must. -
Photoshop 101 - Path and Direct Selection Tools
The path and selection tools let you quickly move and manipulate any shape with a path. Part of the workhorse tools of Photoshop they will let you shift and change shapes quickly.