Pattern Brushes in Illustrator Part One
Pattern Brushes in Illustrator are a great way to create complicated designs in no time. Part one shows an example of how to use Pattern Brushes with circles.
A simple start 
The simplest way to use pattern brushes is to use them on circles. This is a quick way to get started as you don’t need to define the corners. We’ll get onto that later but we will have some instant gratification first!
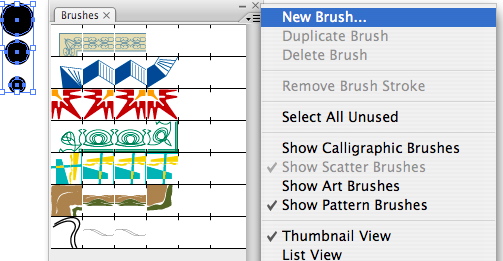
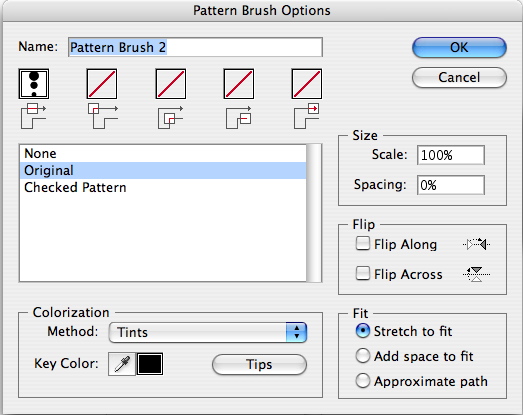
First draw three circle of diminishing size in a line. Use the Align Toolbar to line them up (this is at the top of the default workspace). Now choose the select tool and drag a rectangle around the three circles to select them. Now call up the brushes panel by going to Window > Brushes. Click the fly out menu in the top right hand corner of the panel and select “New Brush”. Select “New Pattern Brush” on the next screen. Then you should see this screen:
Give your brush a name and if you want to be able to change the colour of the pattern select Tint under Colorization.
Using your pattern 
Using your pattern is simple. Draw a circle with a 1pt stroke of any color. Then with the circle selected click on the pattern you have just created in the brushes panel. You can change the color by changing the colour of the stroke. If you don’t see your brushes panel you can get it back by going to Window > Brushes. You can quickly build up illustrations and designs using this technique. In this example I’ve combined this technique with the blend tool.

Using pattern brushes in this way is another great way to create complex looking designs in no time.
Tags
Can you help make this article better? You can edit it here and send me a pull request.
See Also
-
Circular shapes and patterns in Illustrator
Making circular shapes and patterns in Illustrator is straightforward using a simple technique. Here's how to save yourself some time. -
Repeating shapes in Illustrator
Here's a simple tip I came across for quickly creating repeating shapes in Illustrator. Give it a try it. -
Illustrator 101 - The Blend Tool
The blend tool is a great way to build out shapes and design elements in Illustrator. Here's a quick overview of how it works and some techniques to apply.