Illustrator 101 - The Magic Wand Tool
No wizards just a solid tool that allows you to select objects based on defined criteria and make quick changes to your drawings and illustrations.
Les Dawson - a great comedian 
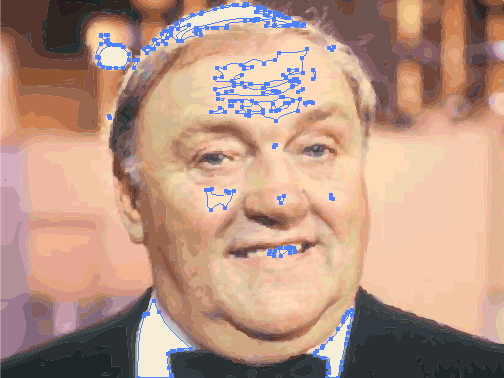
In this article I’m going to use a photograph of Les Dawson, a legendary British comedian. For those of you who don’t know him he had a deadpan delivery and remains one of my favorites. In this example I placed (File > Place) the image into my illustrator file and used the Photo High Fidelity option in Live Trace. You will see below that the Live Trace does an amazing job of transforming the Photography to a vector based image.

How the tool works 
The Magic Wand Tool works by selecting objects within your file that have the same attributes as the one you first click. The attributes you can target are:
- Fill colour
- Stroke colour
- Fill and Stroke colour
- Stroke weight
- Opacity
In short this tool saves you time when you want to change the same attributes throughout your illustrator file.
Selecting highlights 
Let’s say we want to select the highlights in the image. By choosing the Magic Wand tool we can target this. Click on the colour that you want to change and all of the other colours in the image will also be selected. This can save hours. Instead of going through the image and individually selecting each colour you can do it with one click.
If you find that the wand selects too many different selections you can remove selections by holding down ALT on Windows or Option on Mac and clicking. This is a really useful feature allowing you to precisely target what you looking to change.
Customisation 
You can also customise this tool to select exactly the objects you want to target. To bring up the menu choose Window > Magic Wand. This will show you the following menu:
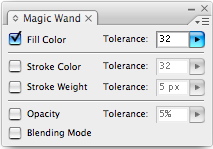
You may need to click the flyout menu in the top right hand corner to see all of these options.
Here you can customise the tool to select exactly what you are looking for.
Fill color 
If you select this the tool will choose colours that are close to the colour your have selected. Use the tolerance option to specify how close the colour should be to the one your select. If you choose 1 it will be exatly the colour you select
Stroke color 
This will select all objects with a stroke colour similar to the one you select. Again if you choose 1 it will be exactly the same. Don’t forget that you can combine criteria so if you select Fill Color and Stroke Color it will look for both.
Stroke weight 
This matches objects with a stroke weight similar to the one you select. Tolerance gives the tool leeway from your selection. If you click on a shape with a 4px and you have stroke weight tolerance of 3px it will select all objects of 3px and also shapes with strokes 3px either side of 4px so 1px to 7px.
Opacity 
This selects any object with the Opacity that you specify. You can set the tolerance in percentage points. This will select other objects x% either side of what you have selected.
Blending mode 
This selects objects based on the blending mode used. If you click on an object with soft light then all other objects with soft light will be selected
The Magic Wand Tool allows quick global colour replacement and targeted selection of objects within your document. Why bother selecting individual objects when you can let the magic wand tool do it for you?
Tags
Can you help make this article better? You can edit it here and send me a pull request.
See Also
-
Illustrator 101 - Selection tools
Understanding the selection tools is a must for working with icons or illustrations. Master the basics and you will save yourself a great deal of time.