Creating custom shapes in Photoshop
A less well known feature of Photoshop is that you can create custom vector shapes and use them throughout your designs. Here's an of examples of how to do it.
Custom shapes work in much the same way as custom patterns. First you make the shape using a standard empty document and using any of the vector based tools or selection tools. This can be the pen tool or any of the custom shape tools. Here’s my way of doing it although there are many others.
Creating the shape 
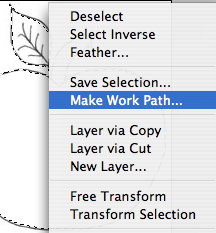
You can create shapes from anything. You could use the pen tool, or any of the shape tools. In this example I’m going to take a sketch of an apple and make it a custom shape. First I start by using the Magic Wand tool to trace the outline of the sketch.

Once you have selection right click and choose Make Work Path. This makes your selection into a Path.
If you are not happy with how it has turned out you can use the Direct Selection Tool or the Pen Tool to fine tune corners and edges.
Making it a custom shape 
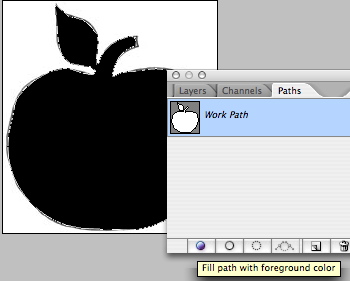
Once you have a path you are happy with pull up the Paths pane. You can find this as a tab in the Layers pane or by going to Window > Paths. You will see your path at the top of the pane. In the bottom left of the pane is a small dark circle. If you hover over it it will say “Fill Path With Foreground Color”. If you click on it it will do just that.
Now go to Edit > Define Custom Shape to add this shape into your library. That’s it. The shape is now available as a vector shape using the Custom Shape Tool (shortcut U). Having a good library of shapes is invaluable for giving extra touches to designs.

Tags
Can you help make this article better? You can edit it here and send me a pull request.
See Also
-
Using patterns in Photoshop
Patterns area hidden gem in Photoshop. Here's a short tutorial showing you how to make your own and how to use them in your designs. -
Making promotional graphics
A well designed promotional graphic can be a great way to drive traffic through your site. Here's one way to do it. -
Choosing a colour scheme for the web
Choosing a colour scheme, or swatch, is one of the first things you need to do in planning a design. Thankfully Adobe provides a number of tools that make creating and managing swatches simple.